3.2: Basic Component Setup
The example in this section assumes that you have Visual Studio 2017 and the above mentioned GH add-on installed. In order to make things easy, the script will be analogous to that presented in section 2.4.2. Follow these steps to set up a project for creating a GH component which makes use of Karamba3D functionality:
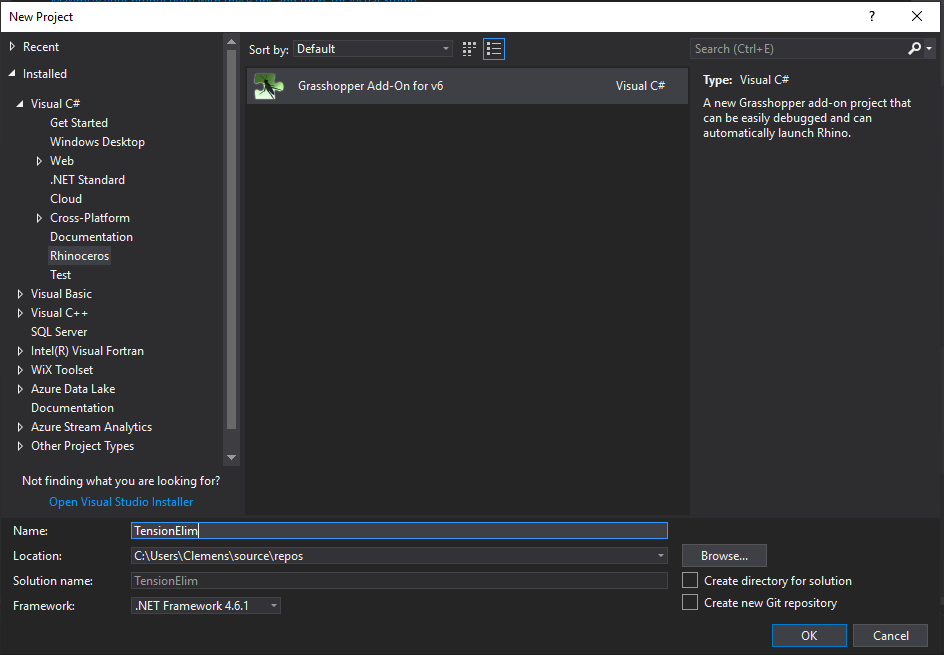
Start Visual Studio and select “File/New/Project . . . ” from the main menu. A Window appears which lets you select from among different project types (see fig 3.2.1).
Go to the bottom of the window and set the name of the project to “TensionElim”.
Grasshopper loads plug-ins according to the alphanumeric order of their file-names. If a component intends to use Karamba3D functionality make sure its name comes after “Karamba3D” otherwise it will not be able to reference it.
Browse to a folder where your project shall be created using the “Browse”-button
Unhook the “Create directory for solution”-option.
Select “Visual C#” from the right hand side tree-menu of installed templates. In case you want to script in VB select the corresponding entry. Double-click on “Grasshopper Add-On” in the middle part of the window (see fig. 3.2.1).
Another window appears that lets you configure the properties of the Grasshopper component.
You can now change the name, nick-name, category (e.g. “Karamba3D”) and subcategory (e.g. “Extra”) under which the component appears inside Grasshopper – but they can also be changed later on.
In case that the path to Grasshopper, RhinoCommon or Rhino appears in red click on the “...” button and point to the right directory.
Press “Finish”. The GH component wizard now creates the project “TensionElim” which already contains the basic frame for a GH component.

Select “View/SolutionExplorer” to get a list of all files that belong to the project. The file “Assem- blyInfo.cs” in the “Properties”-folder of the SolutionExplorer lets you set the title of your assembly, a description, a copyright message and so on. The folder “References” lists all those assemblies which the component borrows functionality from. By default these are “GH_IO”, “Grasshopper”, “RhinoCommon” and some system assemblies. In “TensionElimComponent.cs” you will find the definition of the class “TensionElimComponent”. It inherits its functionality from the class “GH_Component” and thus lets you define the properties and behavior of the component later visible in GH.
As a first try right-click on the project “TensionElim” and select “Build” from the context menu. If all goes well the file “TensionElim.gha” gets created in the “bin”-folder of the Visual Studio project. Copy this file to one of the places where Grasshopper looks for plug-ins at start-up. Among others these two choices exist:
The “Libraries”-folder of Grasshopper. It sits in the user-directors under “C:/Users/Username/App- Data/Roaming/Grasshopper/Libraries” an can be accessed from within Grasshopper via the menu “File/Special Folders/Components Folder”. The advantage of putting a plug-in there is, that a user does not need any special privileges to install it.
The “Plug-ins”-folder of Rhino to be found at e.g. “C:/Program Files/Rhino7” when working with Rhinoceros 7. Placing a plug-in there makes it accessible to all users of the computer. The disadvantage of this file location lies in the fact that one needs to have admin-rights to install a file there.
Karamba3D lives in the “Plug-ins”-folder of Rhino. So plug-ins which reference its functionality need to be placed there as well.
In order to avoid the manual copying of the “.gha”-file you can setup a post-build-event in the Visual Studio Project settings – this makes debugging more comfortable: Right-click on the project entry in the Solution Explorer, select “Properties”, choose “Build Events” from the left-hand tabs, and add in one line at the end of the “Post-build event command line” text window:
Copy ’’$(TargetDir)$(ProjectName).gha’’
’’C:\Users\YourUserNameHere!!\App Data\Roaming\Grasshopper\Libraries\$(ProjectName).gha’’
or
Copy ’’$(TargetDir)$(ProjectName).gha’’
’’C:\ProgramFiles\Rhino6\$(ProjectName).gha’’
In case you use Rhino 6. Do not forget to replace “YourUserNameHere!!” by your user name in case of option one. For option one has to assume ownership of of the Rhino “Plug-ins”-folder and acquire write-rights otherwise the copy command fails.
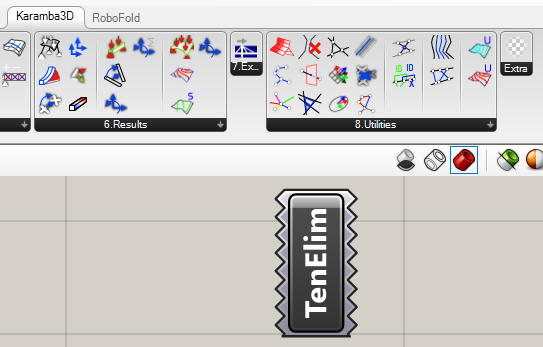
Upon starting (or restarting) GH there should now show up a new icon in the category and subcategory previously provided by you in the constructor of the “TensionElimComponent”-class (see fig. 3.2.2). As yet there is no image attached to the new button. Therefore it shows up as a circle filled with black and white rectangles. Take a look at the function “Icon” of the “TensionElimComponent”- class to change this if you want. You will also notice that the new component has neither input- nor output-plugs.

Last updated